Allotments
System Data > Reservation > Allotments
Attention!
 Access to this menu is controlled by the PAirSDAllotments
user right. If the menu is not displayed, you may not have this
right. In this case, contact your administrator.
Access to this menu is controlled by the PAirSDAllotments
user right. If the menu is not displayed, you may not have this
right. In this case, contact your administrator.
System Data > Reservation
> Allotments > Allotment type
You can use the Allotment types
function to manage your own allotment types and assign an individual type
to each allotment in the Allotment Management (Reservation >
allotments).
Use the function to divide your allotments into various segments, such
as weddings, events and meetings, business events, and much more. You
can arbitrarily create the allotment types in your protel Air system data
and adjust them individually to meet your needs.
What's the advantage for you? You can define a separate workflow for
the contract status flow for each allotment type (see section below: Contract status flow).
Creating and editing allotment types
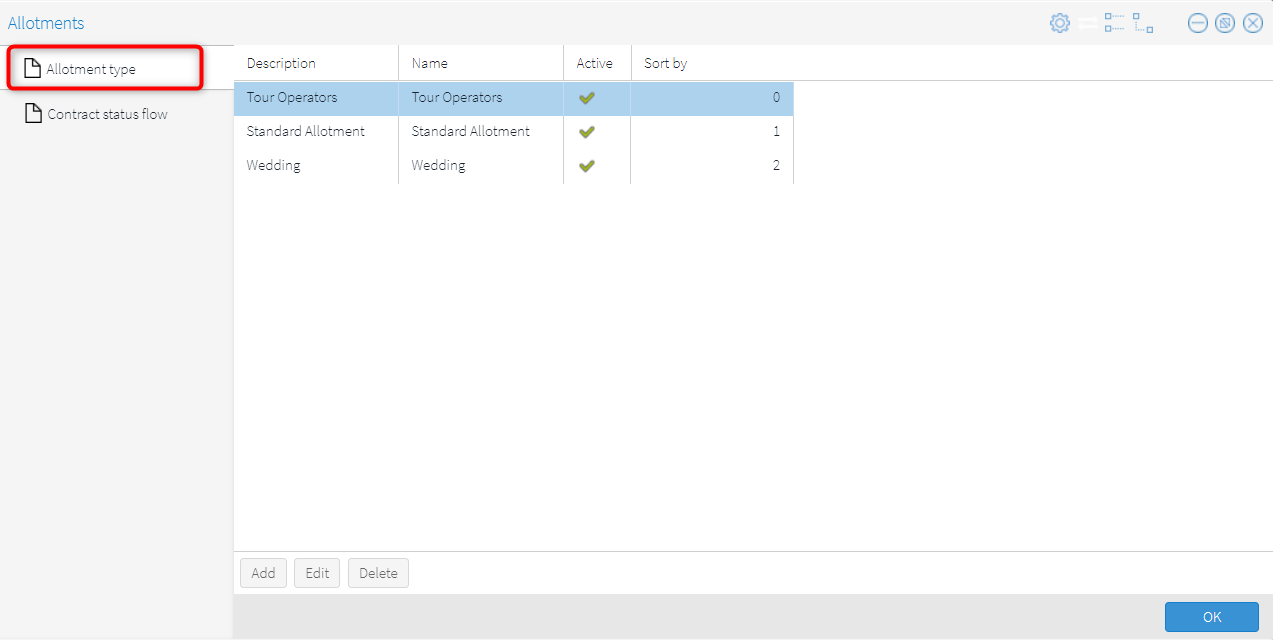
Open the Allotments window in protel Air's system data and click on
allotment type:
System Data > Reservation > Allotments
> Allotment type
Click on Add to create a new
allotment type; click on Edit
to change an existing allotment type.
The Allotment type window opens.

Name: Enter a name, for example
"Bus tours", if you want to use "Bus tours" as an
allotment type.
Description: Enter a detailed
description to specify the allotment type in more detail.
Sort
by: Enter a number for the order sequence. The allotment type
is displayed in all drop-down lists based on the defined sequence.
Example:
The sort numbers entered in the example illustration...
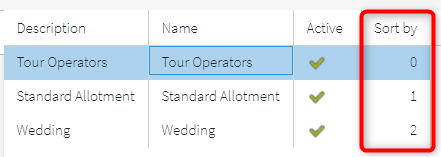
...ensure, for example, that the allotment
types appear in the appropriate order in the dropdown list in the Allotments
dialog box:

Active checkbox: An allotment
type can be deactivated by removing the check mark. Inactive allotment
types are not available as selections in the software, that is, they cannot
be assigned to an allotment.
XSetup: Allotment type as mandatory entry
Upon request, you can also define the Allotment type as a mandatory
field:
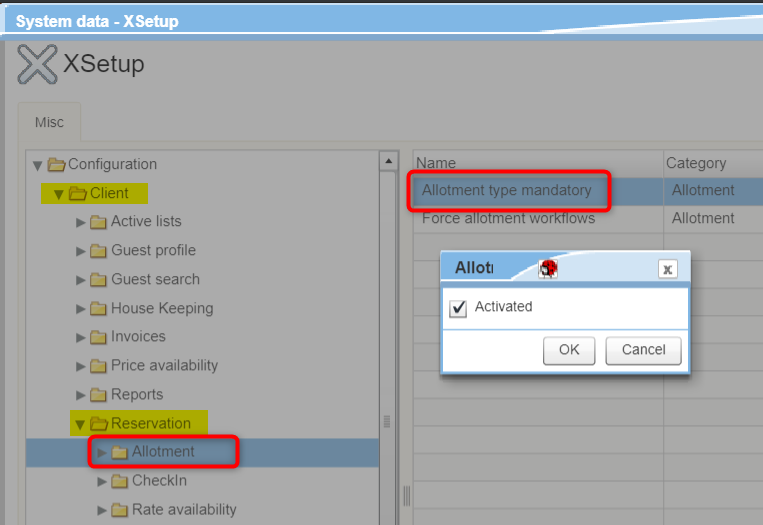
Double-click
the Allotment type mandatory entry
and check the Activated checkbox.
System data > Reservation
> Allotments > Contract status flow
Define different workflows that specify an exact contract status flow
and support the user with processing allotments.
You can easily create your individual workflows by defining the individual
steps that a certain allotment type (e.g. 'bus tours') usually goes through
at your hotel.
Several steps together represent the contract
status flow, which you can define for each allotment type.
XSetup: Activate contract status flow
The administration of individual contract status flows for various allotment
types must be activated using the following system settings:
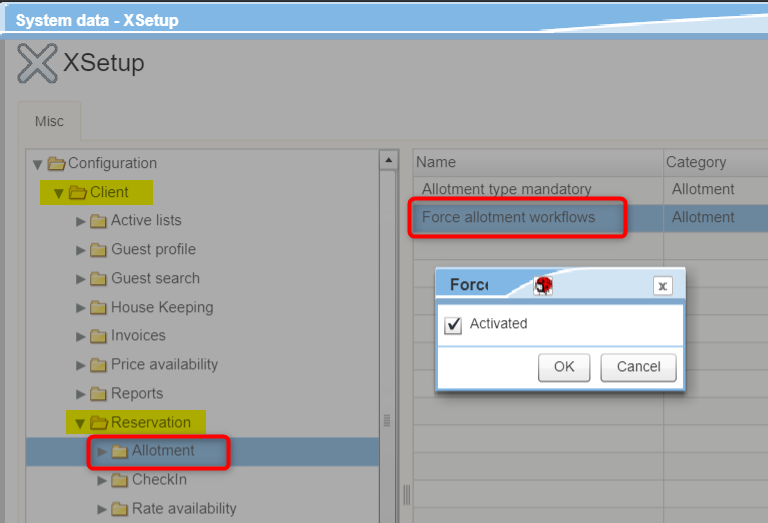
Double-click
the Force allotment workflows
entry and check the Activated
checkbox.
Type:
Boolean
Default:
not activated
Important!
The Force allotment workflows
XSetup must always be set in combination with the Allotment
type mandatory XSetup (both entries must be set to "activated")!
After activating the function, the user must always select an
allotment type and the current step for each allotment. The steps
are predefined by the respective contract status flow (see below:
Setting up the contract status flow).
Setting up the contract status flow
In the protel Air System data,
select the Reservation menu point
and then the Allotments submenu.
Then click on the Contract status flow tab:
System data > Reservation > Allotments
> Contract status flow
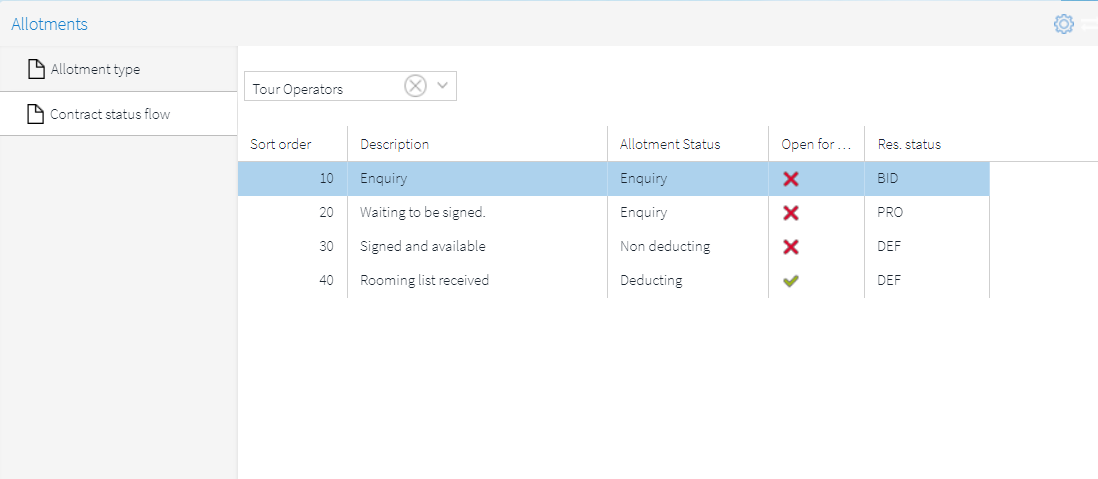
IMPORTANT
The information displayed is ALWAYS related to the allotment type that
has been selected above:
In the example, the Tour Operators
allotment type has been selected.
By default, the allotment type with the lowest sort number is always
preselected (see above: Creating and Editing Allotment Types | Sort
by)
Creating new contract status flow
System data > Reservation > Allotments
> Contract status flow
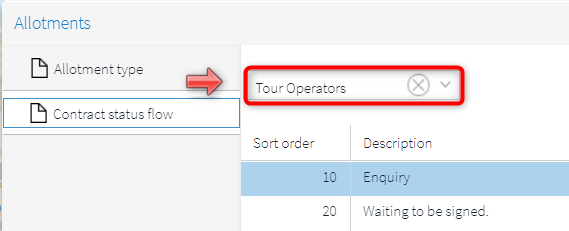
In the Allotments
system data dialog box, click on the Contract
status flow tab.
At the top of the window, select the allotment
type for which you want to create a new contract status flow - see the
following screenshot:

Click on [Add] to add a new contract status
flow.
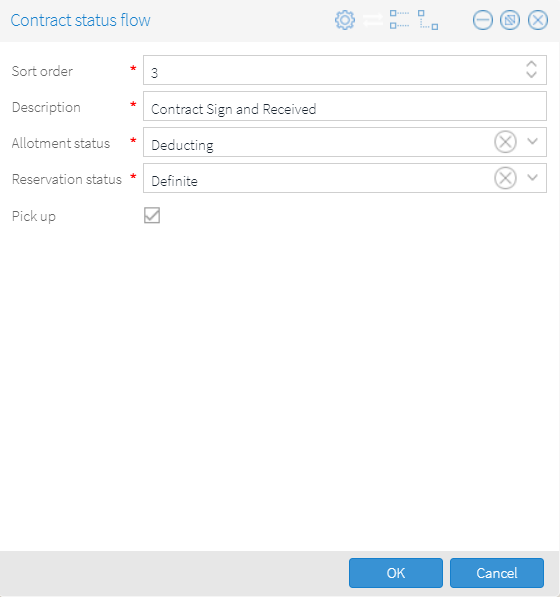
The Contract status flow window opens
Please enter the following information (fields
marked by an asterisk* are mandatory):
Sort Order:
Enter a number for the order sequence. The step is displayed in the order
specified here. We recommend entering in steps of ten, i.e. 10 for step 1,
20 for step 2, 30 for step 3, etc. This makes it easier to sort
later, if necessary, or to classify new steps!
Description:
Enter a detailed description to specify the contract step in more detail.
Allotment
status Enter an allotment status that is to be assigned to the
allotment when this contract step has been selected.
Reservation
status: Enter an allotment status that is to be assigned to the
allotment when this contract step has been selected.
Pick up:
Select this checkbox if the allotment is to be set to Pick
up for this contract step.
Example:
Organize the number of steps - one after
the other - that the contract status flow is to have.
A completed contract status flow could look
something like this:

