Vouchers
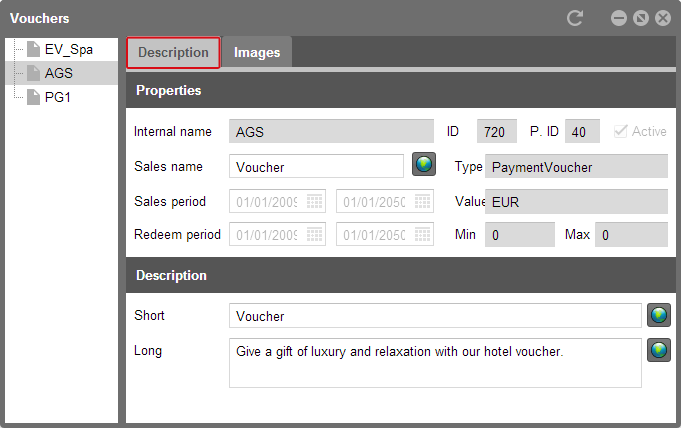
By clicking the menu item “Vouchers”, the dialog opens and shows the “Description” tab. This dialog allows you to enter voucher information in various languages.
protel Cloud Center > Online Booking > Vouchers > Description
 |
Note For all fields with a globe symbol you can enter a translation. Please read section Translations for more information. |
All entry fields with a white background can be edited as needed. These white entry fields are synchronized only once. This means that once you’ve entered a certain title for your voucher for the Internet, it will not be overwritten during the next synchronization.
The "Active" check box has been grayed out because vouchers can only be activated or deactivated in protel SD. If a voucher is deactivated in protel SD, it will appear under “Expired vouchers.” Then the “Active” check box will also not be set.
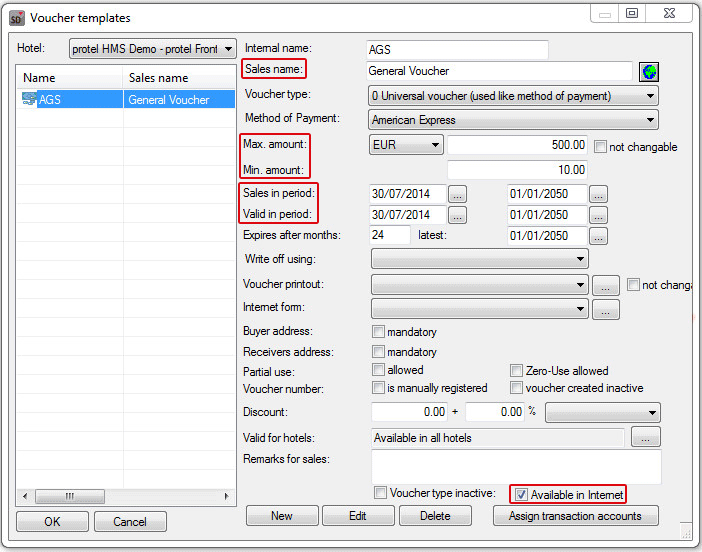
Voucher templates in protel SD
The “sales name” and “description” can be edited in the protel Cloud Center; all other data is retrieved from protel SD. In the system data you can enter the sales name, the minimum and maximum amount for the voucher and define the sales and redemption periods. The vouchers in protel SD are automatically activated for online use. A deactivation in the protel Cloud Center is not possible.
protel SD > Reservation > Vouchers
Images
As you have already done for your previous dialogues, you can also upload images for your vouchers by using the "Images" tab.
Note Detailed information about the upload, size and quantity of images can be found in the introductory chapter Login and general settings. |

protel Cloud Center > Online Booking > Vouchers > Images
Click on the [Upload] button and a new window opens.
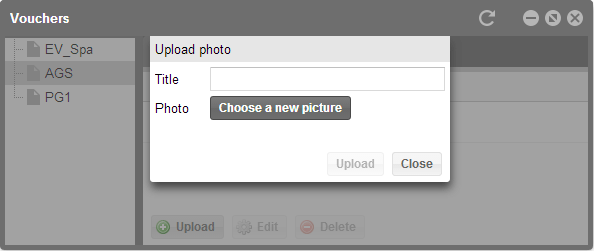
protel Cloud Center > Online Booking > Vouchers > Images > Upload
Enter a title for your image and click on [Choose a new picture] to select an image from your computer. Then, click on the [Upload] button.
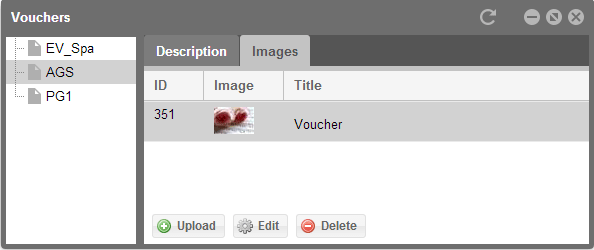
protel Cloud Center > Online Booking > Vouchers > Images
The entered description together with the image could look something like this in protel WBE:
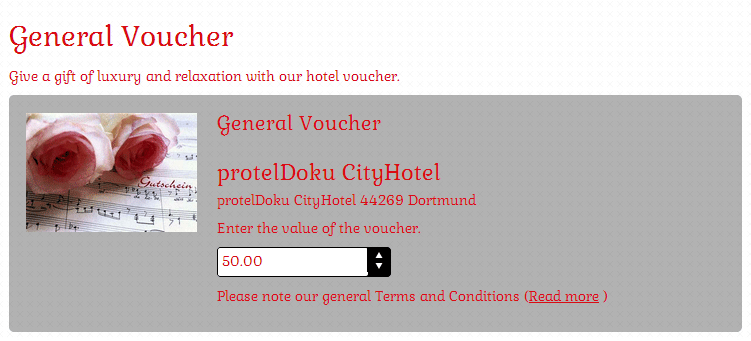
Illustration of a voucher in protel WBE 4.0
Activating vouchers for the WBE
In order to enable your guests to redeem the vouchers in the WBE, they will first have to be activated. If you are sharing your WBE with other hotels, please check to see that the hotel, i.e., hotel group, has been created for the WBE in the protel Cloud Center. Then, open the “Online Booking” selection menu and click on “Channel information”.
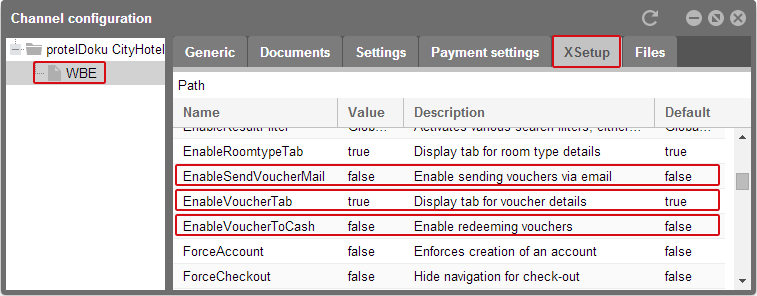
protel Cloud Center > Online Booking > Channel information > WBE > XSetup
In the left column, select the WBE and open the "XSetup" tab to the right. There you will find a list of the settings which you can use to customize your WBE. The second column will show you if the function has been activated (“true”). Look for the EnableSendVoucherMail, EnableVoucherTab, and EnableVoucherToCash entries.
Click on the respective entries and a check box will appear in the second column. Select each check box to activate the function. If you then click on another part of the window with your cursor, the selected check box will switch to “true”. The voucher function has been successfully activated.
Vouchers in the WBE
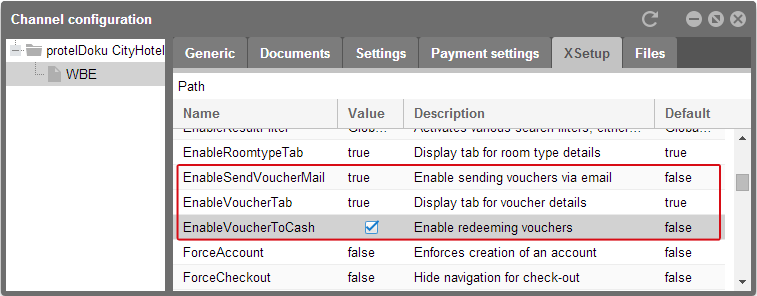
By activating the EnableSendVoucherMail function, you are giving your guests the possibility of sending a voucher directly as an email. This option will be offered for the purchase of a voucher after activation.

Illustration of a voucher purchase in protel WBE 4.0
By means of the EnableVoucherTab function, the voucher tab will be activated in the search results.
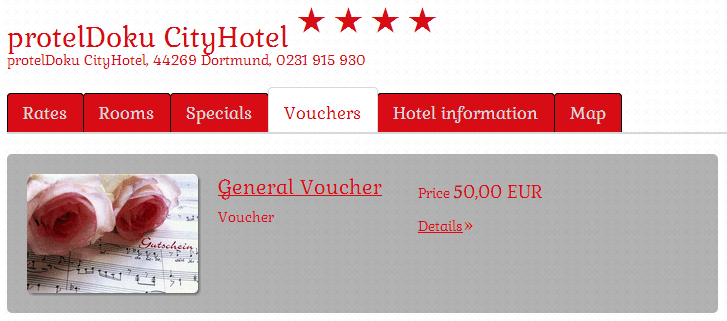
Illustration of a voucher tab in protel WBE
There your guests will be offered the vouchers which you have configured in protel SD and in the protel Cloud Center.
With the EnableVoucherToCash function, you have activated the entry field in the shopping cart which will enable your guests to redeem vouchers.
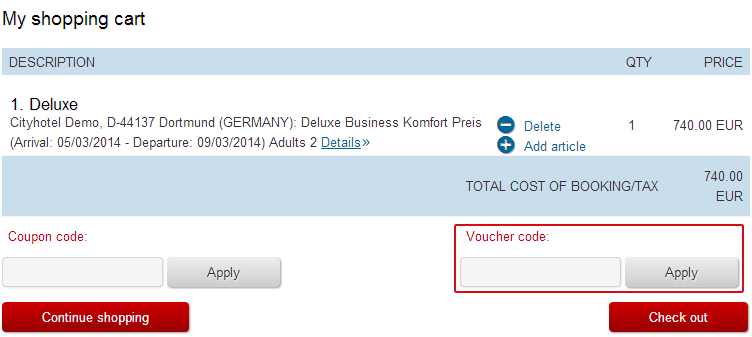
Illustration of a shopping cart in protel WBE 4.0 with the voucher function