Copying allotments
[Reservation
> Allotments]
You can create one or more copies of a selected
allotment.
What is copied by default?
When you copy an allotment, the system copies
the following data from the original allotment:
What isn't copied by default?
Allotment Status
The status is always set to Enquiry
by default and might need to be adjusted for each copy.
Allotment type
Contract status flow (if
a workflow is defined using the allotment type. For more information:
System data > Reservation > Allotments > Contract
status flow)
Action log entries
General Information
Open the allotment that you would like to
copy in the Reservation > Allotments window and click on the
Copy button located at the bottom
of the Edit allotment window.
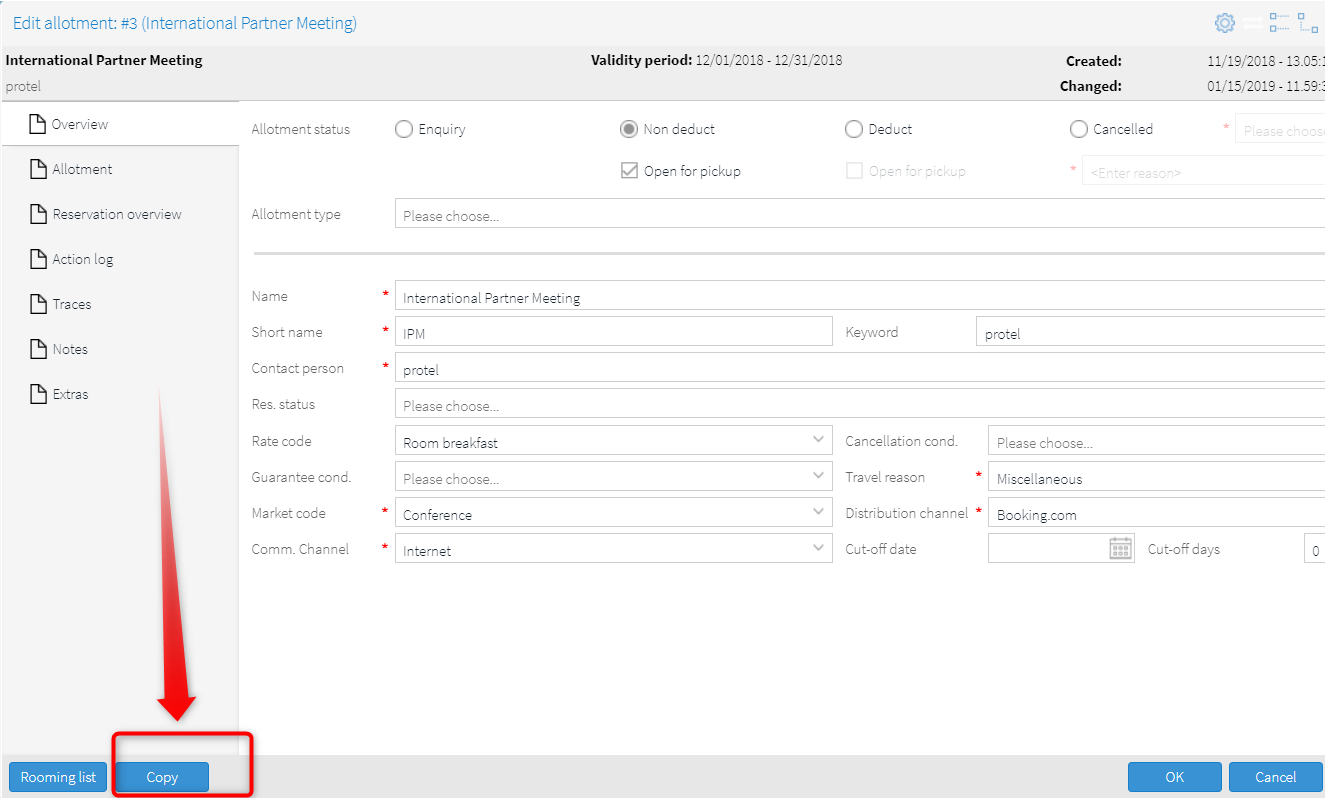
The following window
then opens:
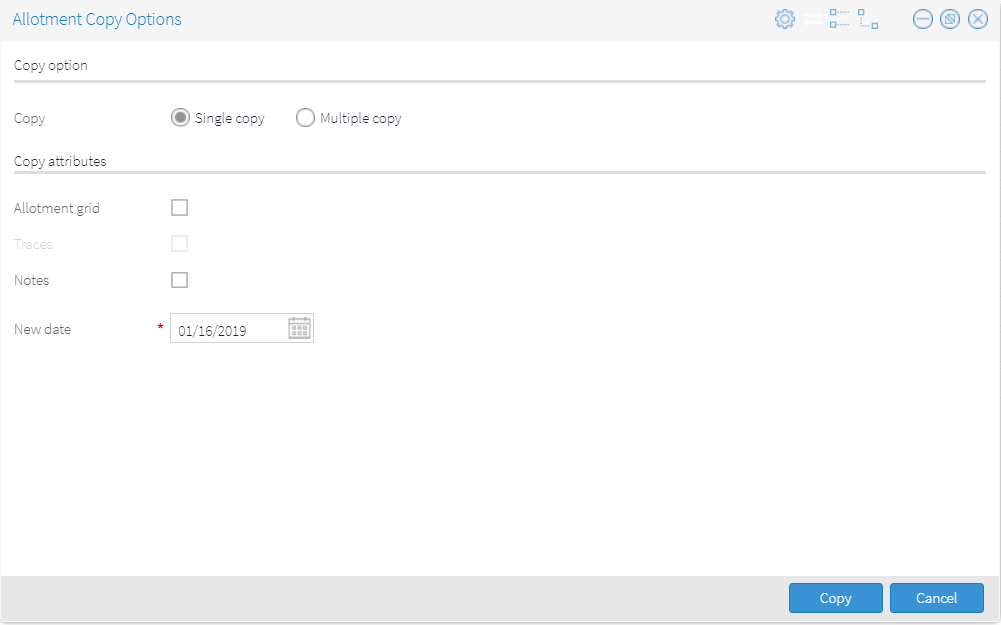
There are various options
available for copying.
Copy option |
Single copy |
When selecting
Single copy, the allotment
is copied once. |
Multiple copy |
If the
Multiple copy option is
selected, several copies of the allotment can be made. This option
is useful if, for example, a corporate customer books an allotment
of 10 rooms every two weeks from Wednesday to Friday over a period
of 6 months.
With Multiple copies, each copy is
assigned the same tour code. You can either create a new
tour code or select an existing one from the drop-down
list (see below: New tour Code / Add to existing).
If you select the Multiple
copy option, a new input area appears below in which you
can set the number of copies (see Creating
a Multiple Copy). |
New tour code |
Only active
in conjunction with the Multiple
copy option.

Select this option if you want to
use a new tour code for the copy. Entering the desired name of
the new tour code in the text field creates a code, and a copy
is created to which the new code is assigned. |
Add to existing |
Only active
in conjunction with the Multiple
copy option.
Select this option if the copy is
to be assigned to an existing tour code. In this case, select
the desired code from the drop-down list.

This option is recommended if the
new allotment belongs to a tour program that has already been
stored in the system. |
Copy attributes |
Allotment grid |
Activate
this checkbox if you want the copy to contain information from
the allotment grid.
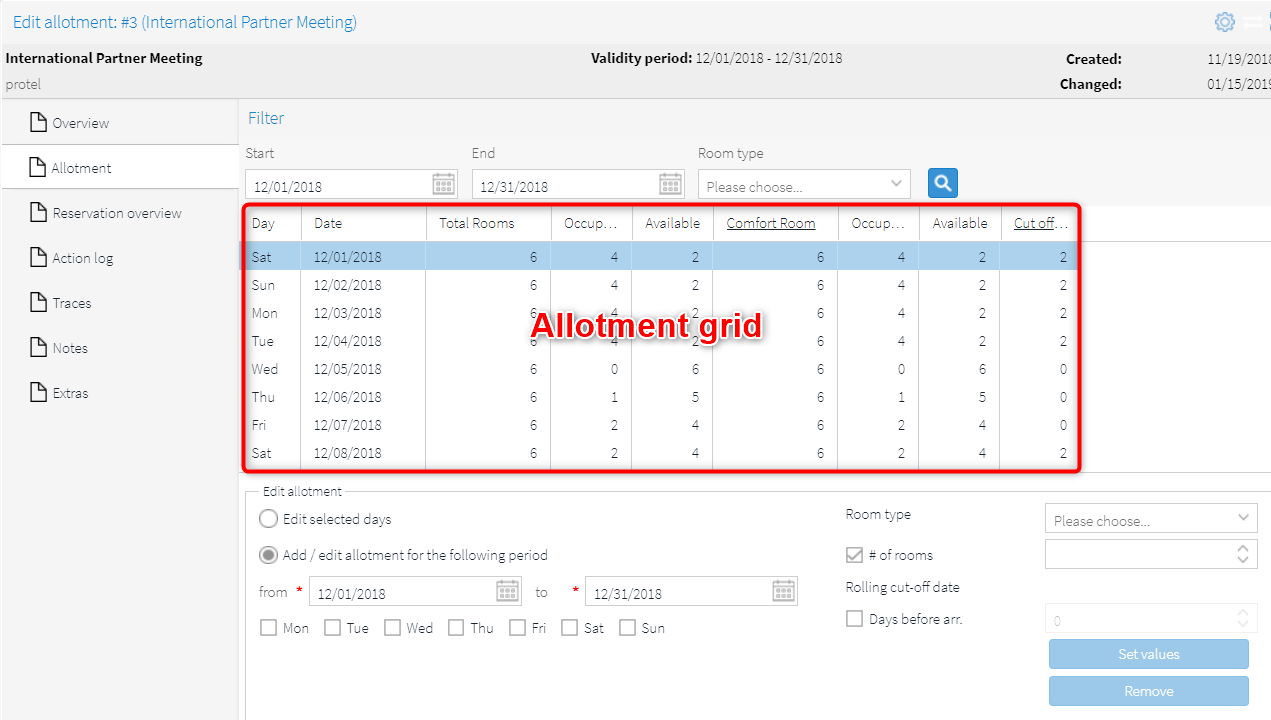
The allotment grid contains the time
period, the days, and the number of allotted rooms and room types
for which allotments have been set - see the red frame in the
following figure:
 NOTE:
Using
certain weekdays, when necessary NOTE:
Using
certain weekdays, when necessary
If the original allotment
is only valid on certain weekdays, make sure that you
start the copy on a date that corresponds with the first
weekday of the original allotment!
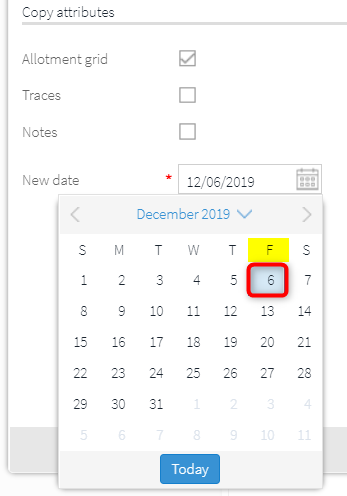
Example: An allotment is
only valid on Fridays, Saturdays and Sundays. If you want
the copy to start on a Friday, make sure that you set
the start date so that it falls on a Friday - see the
figure below.
|
|
Traces |
This checkbox
is only active if the Allotment
grid checkbox has been selected because information from
the allotment grid is required to copy traces. |
Notes |
Activate
this checkbox if you want the information contained in the Notes field to be copied from
the original allotment. |
New date |
The date
selected here determines when the new allotment is to start. If,
for example, the original allotment is for an entire month (e.g.,
03/01 - 03/31), the time period for the copy will start with the
date you select here. |
Creating single copy
Open the allotment that you would like to copy in the Reservation > Allotments
window and click on the Copy
button located at the bottom of the Edit
allotment window.
In the Allotment Copy Options window, select the Single
copy option.
In the Copy attributes
section, select the attributes to be copied from the original (see
previous section): "Allotment
Copy Options"
window).
Enter the desired start date (New
date). This is the date on which the allotment is to start.
If the allotment is only valid on certain days, select the date so
that it matches the first weekday of the original allotment (see note
above): Consider certain
weekdays).
To create the copy, click on the Copy
button.
 The
copy then opens in a new window. Make any additional settings there.
Creating multiple copies
Open the allotment that you would like to copy in the Reservation > Allotments
window and click on the Copy
button located at the bottom of the Edit
allotment window.
In the Allotment Copy Options
window, select Multiple copy.
If the copy is to be created as part of a new tour series, select
the New tour code option.
Then, enter the name of the new tour code into the field.
If the copy belongs to an existing tour program, select Add
to existing and select a tour code from the drop-down list.
In the Copy Attributes
section, select the attributes to be copied from the original (see
section: "Allotment
Copy Options" window).
In the lower part of the window, enter the number of copies
you want to create.
Example
The data record for the first copy is created
automatically- see the following sample screenshot.
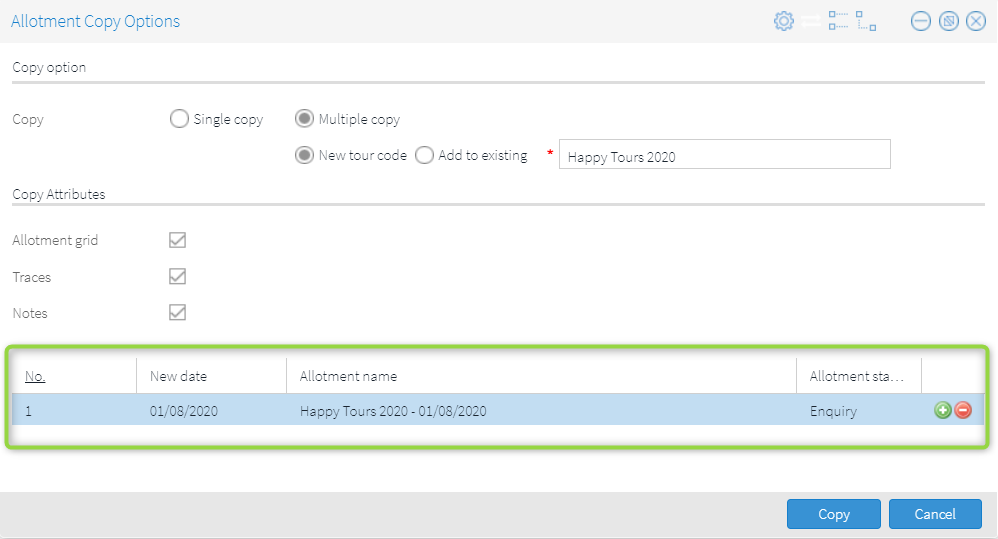
No. |
The system automatically issues
a number which cannot be edited. |
New date |
Select
the start date on which the copied allotment is to start.
By default, the current business date
(end of day closing date) is preselected as the New
date. |
Allotment name |
The name
of the allotment is automatically entered according to the "Tour code name"
scheme (= the tour code entered or selected above) + "New
date". |
Allotment
status |
By default,
the Enquiry status is
always selected as the Status.
As need might arise, the status can be adjusted later in the created
copy. |
To create an additional copy, click
on the green plus sign  .
.
Enter the desired starting date for the next copy (New
date column).
Click on the green plus sign to make as many copies as you need.
Then, click on the Copy
button to create the copies.
 A new window opens with a list of the newly created copies - see the following
figure (click the magnifying glass symbol to refresh the display):

Hint:
Hide unneeded columns or rearrange the order of the columns and save the
list view (for more information see here: Column
Settings).
 The protel Air
upgrade in Summer 2020 brought about changes to the
user interface and also to many functions.


 The
copy
 .
.
