User defined fields
[System data  System
  User-defined fields]
As an add-on
for existing data fields, protel Air offers the possibility of creating
your own so-called user-defined fields. Using the fields can help you
capture information that has been especially tailored to meet your needs.
Add
new fields
Open the system data menu and click
System > User-defined
Fields
Select the desired element from
the tree-view.

Click
the [+] symbol to add a new UDF to the respective element.

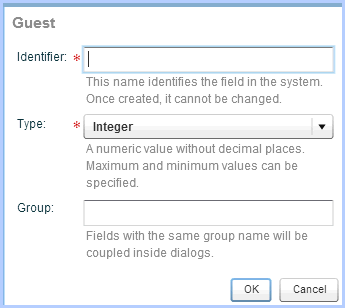
Enter
a new identifier. The identifier
locates the field in the system and can not be changed afterwards.
Select
a Type. The Type
tells you in which form the entries for the new field are to be made:
Integer |
A number without any decimal places
should be entered into the user-defined field. |
Single
selection |
This user-defined field only has
the values “yes” or “no” at your disposal. |
Text |
Single or multi-row texts are supposed
to be able to be entered into the user-defined field. |
Selective
list |
The user-defined field offers a drop-down
menu. You can use a further step to define the values for the
drop-down menu. |
Group:
You can enter a group if the user-defined field is to belong to this
group.
The
following information can be saved in the Basic Settings
area.

Display
name |
The field will be displayed in the
reservation / guest profile using this name. |
Group
(optional) |
The name of the group to which the
user-defined field belongs. Only to be entered, if desired. |
Read
only |
Select this check-box in order to
activate the write protection for this field. |
Mandatory
field |
Select this check-box in order to
mark this user-defined field as a mandatory field. It will be
mandatory for the user to fill out this field. A guest profile
or reservation will not be able to be created should this field
remain empty. |
Description
(optional) |
Enter a text which describes the
field more clearly (optional). |
Depending on which type was selected
in step 5, the available settings will vary in the Field
value area (see respective paragraph in the “field value” chapter).
Values
Integer
Enter a new standard value. The user-defined field will be preset using
this value.
Add an additional validation area: What is the number range of the value
in this value area (minimum - maximum)?
Single selection
When using the single selection, you can only choose between the values
yes / no (e.g., the answer to a question).
Example: Advertising requested?

Text
Default value: Should the field
be preset with a standard value? If yes, enter the desired text for the
standard value here.
Multi-line: Set a check here
if you want to allow texts with several lines.
Max length: What is the maximum
number of characters a text is allowed to have?
Masking: The text will be hidden
- for example for passwords.
Selective list
The selective list offers the user a prefabricated list to choose from.
List entries: Click the [+]
symbol to add an entry to the list. The new entry <New Element>
appears. Click it and enter the desired text afterwards.
Multiselect: If the user is
to be able to select more than one entry from the list, place a check
here.
Default value: Should the field
be preset with a standard value? If yes, select the desired entry here.
Click [Apply]
and then [OK] in order to save
all of your entries.
[System data > User
defined fields > Membership cards]
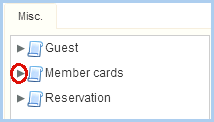
Click the little gray arrow in front of the membership cards entry:

Subsequently, all of the membership cards which you have created in
the system data (> guest profiles) will be displayed.
Click on the membership cards, when wanting to create general information,
i.e., fields which are to be saved for ALL cards:

Click on the self-created membership cards, when wanting to compile
a field especially for this card.

Click
the [+] symbol in the lower left.
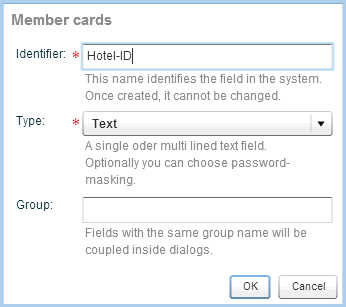
Enter
the desired information (passcode and type):

Subsequently, an additional window will appear.
This is where you can add additional properties for the new field, for
example if it is to be write-protected, if it is a mandatory field, etc...
 Related
information
You can find more about creating membership cards here: System
data > Profiles > Codes > Membership
cards
How to allocate certain membership cards to your guest will be explained
in more detail here:Guest profile >
Extended > Membership
cards.
[System
data > User defined fields > Room type]
You can create user defined fields
for your room types, which enables you to store additional information
such as alternative room type descriptions, etc.
Open the system files and click
User-defined Fields
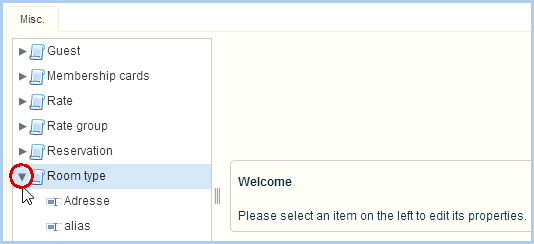
Select the Room
type element from the tree-view.

Fig.: System data >
User-defined fields > Room type |
Click
the [+] symbol. A user-defined field is created for your room types.
Proceed with step four as described
in section "Add new fields" above.
 The protel Air
upgrade in Summer 2020 brought about changes to the
user interface and also to many functions.
 System


